Stop Obsessing Over Your Camera Body — Your Lighting Is the Real Problem
There's a conversation that plays out in creator communities every single week. Someone posts a frame grab from their latest video and asks why it looks "flat" or "cheap." Half the replies tell them to upgrade to a Sony FX3. The other half suggest a new lens. Almost nobody asks about the light.
That's the problem.
Camera body upgrades are exciting. They're tangible. There's a box to unbox, specs to read, a number that goes up. Lighting? Lighting feels boring. It feels like something you figure out later, once you've got the "real" gear sorted.
But if you've ever watched a creator shoot flawless content on a years-old mirrorless camera and wondered how their footage looks so cinematic — the answer, almost always, is light. Not a sensor. Not a processor. Light.
What Your Camera Actually Does (And Doesn't Do)
Here's a quick reality check: your camera is a light-recording device. That's it. It captures the light that hits its sensor and translates it into an image. The quality of that image is fundamentally limited by the quality of the light you give it to work with.
A newer body might handle noise better in extreme low-light conditions. It might have better dynamic range — meaning it can hold more detail in both the shadows and the highlights simultaneously. But none of that matters if the light hitting your subject is flat, harsh, or unflattering to begin with. Better dynamic range just means you're capturing a wider range of bad light.
Professional cinematographers have known this for a century. It's why major film productions employ dedicated gaffers and lighting directors. The camera operator and the DP are important — but the lighting crew is often the difference between a scene that feels alive and one that feels like a surveillance feed.
The Creator Who Proved It
Consider this scenario — and if you've spent any time in YouTube creator spaces, you've seen a version of it play out for real. A mid-level lifestyle creator is shooting with a Canon R6 and posting consistently. The footage is technically fine. Sharp, decent color, good autofocus. But something feels off. The videos don't look expensive. Comments occasionally mention that the production feels "YouTube-ish" in a way that's hard to pin down.
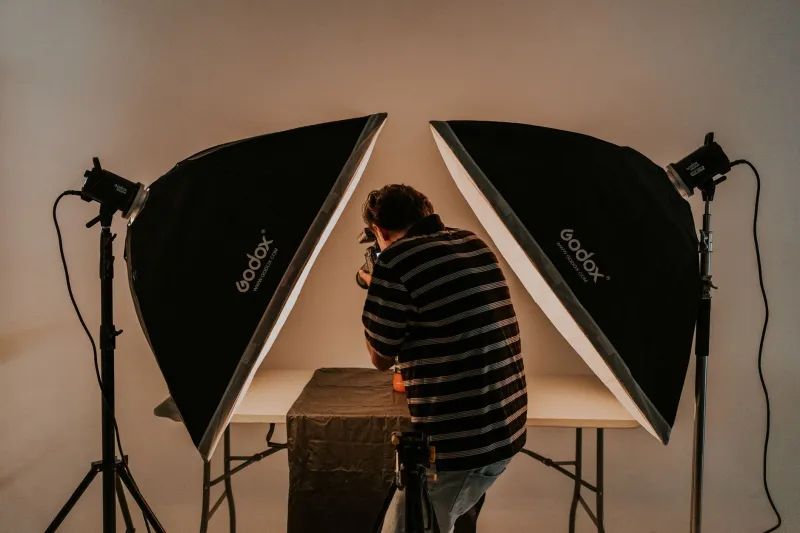
Then, without changing a single piece of camera gear, they invest around $400 in a two-light setup — a key light with a large softbox and a simple LED panel for fill — and reposition their shooting space to take advantage of a north-facing window for natural backlight.
The next video looks like a completely different channel. The skin tones are warmer and more dimensional. The background has natural depth. The subject pops. Viewers start commenting on the "cinematic" feel. Sponsorship inquiries go up.
Same camera. Same lens. Different light. That's not a hypothetical — that's how lighting works.
The Three Lights Every Creator Should Understand
You don't need a film school degree to understand lighting. You need to understand three concepts.
Key Light
This is your primary light source — the one doing most of the work. It's what illuminates your subject and sets the overall mood of the shot. Position it at roughly a 45-degree angle to your subject, slightly above eye level, for a flattering, dimensional look. A large softbox diffuses the light and creates softer shadows, which is almost always more flattering for talking-head content.
Good starting options: Elgato Key Light Air ($130), Godox SL60W with a 24x24 softbox ($120 combined).
Fill Light
The fill light reduces the contrast created by your key light. Without it, the shadow side of your subject's face goes very dark — dramatic for a thriller, not great for a beauty tutorial or a product review. A simple LED panel or even a reflector bouncing key light back toward the subject can serve as fill. You generally want your fill to be softer and less intense than your key.
Good starting options: Neewer 480 LED panel ($55), Westcott 40-inch 5-in-1 reflector ($30).
Backlight (or Hair Light)
This one is the secret weapon that separates "decent" from "professional." A backlight — positioned behind and above your subject, aimed at their hair or shoulders — creates a rim of light that separates them from the background. It adds depth and dimensionality that no camera setting can replicate. Even a small, inexpensive LED panel used as a backlight will transform your shot.
Good starting options: Lume Cube 2.0 ($80), GVM RGB LED panel ($45–$60).
Natural Light Is Real Light
Before you spend a dollar, it's worth saying: natural light is legitimate. A large window with soft, indirect daylight is one of the best light sources available. The issue is consistency — you can't control when clouds roll in, when the sun angle shifts, or what time of year it is. If you're shooting content on any kind of schedule, relying entirely on natural light means your videos will look noticeably different from week to week.
The goal isn't to replace natural light. It's to supplement and control it. A simple key light positioned to mimic or complement your window light gives you consistency without sacrificing that natural feel.
"But What About Low-Light Performance?"
This is the argument that always comes up when this conversation happens: "I need a better camera because I shoot in low light."
Here's the honest response: if you're shooting in low light, the solution is more light. A camera with better low-light performance is a workaround for a lighting problem — and it's an expensive one. A $1,500 camera upgrade that buys you two stops of usable ISO range will cost you significantly more than a $200 lighting setup that eliminates the low-light problem entirely.
There are genuinely low-light scenarios — outdoor evening events, run-and-gun documentary work — where better sensor performance matters. But for 90% of content creators shooting in a home studio, office, or controlled indoor environment? Add light. Don't buy a new body.
Where to Start If You're Starting from Zero
If your current setup is just whatever ambient light exists in your space, here's a practical entry point:
- One key light with a softbox (~$120): This single purchase will do more for your image quality than any camera upgrade at this stage.
- One fill light or reflector (~$30–$55): Balances your key and eliminates harsh shadows.
- One backlight (~$45–$80): Adds depth and separation that makes footage look genuinely professional.
Total investment: roughly $195–$255. Compare that to the cost of a camera body upgrade, and then compare the actual impact on your final image.
The Bottom Line
Camera gear is fun to talk about. It's fun to research, fun to unbox, and fun to obsess over spec sheets. Nobody's judging you for it — we're a camera gear site, after all. But if your content isn't looking the way you want it to look, the camera body is almost never the bottleneck.
Light your subject well, and your current camera will surprise you. Get that right first — then talk about upgrading your body.